Introduction
In this tutorial, we will navigate through the methodical steps of adding a USMP shop component to another mesh using Blueprint in the Unreal Engine. This functionality will enable gamers to interact with an object in your level and subsequently open the shop UI.
You can purchase Ultimate Multiplayer Survival Pack here.
Step-by-Step Guide
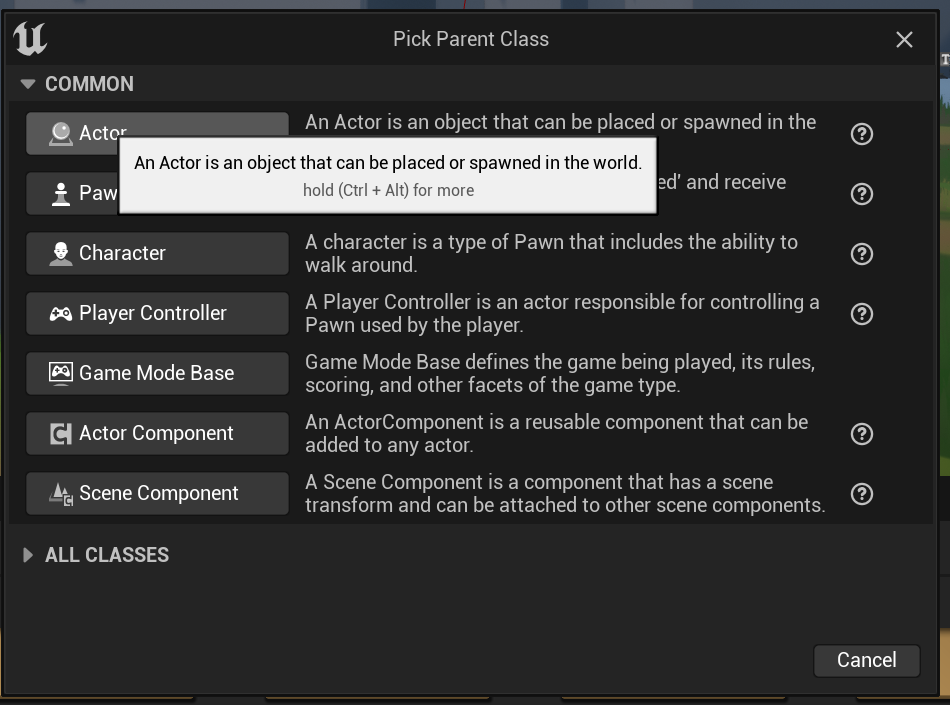
Step 1: Creating a Blueprint Actor
Begin by initiating a new blueprint actor in the Unreal Engine. This actor will serve as a foundation for attaching your mesh and integrating the shop component.
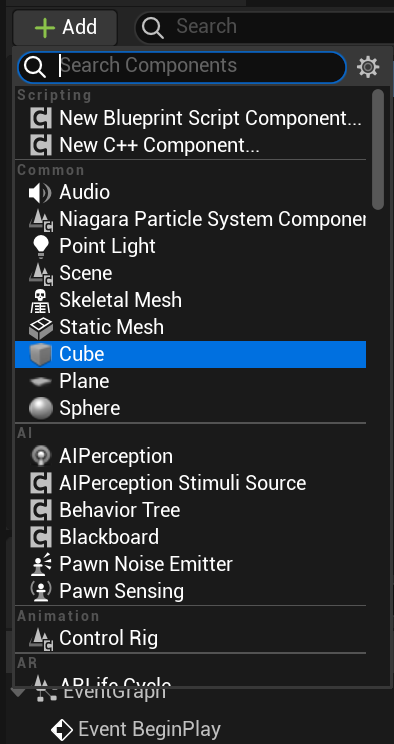
Step 2: Adding the Mesh
- Navigate to the Components panel.
- Select and add your desired mesh to the actor, ensuring it’s configured to meet the design requirements of your game environment.
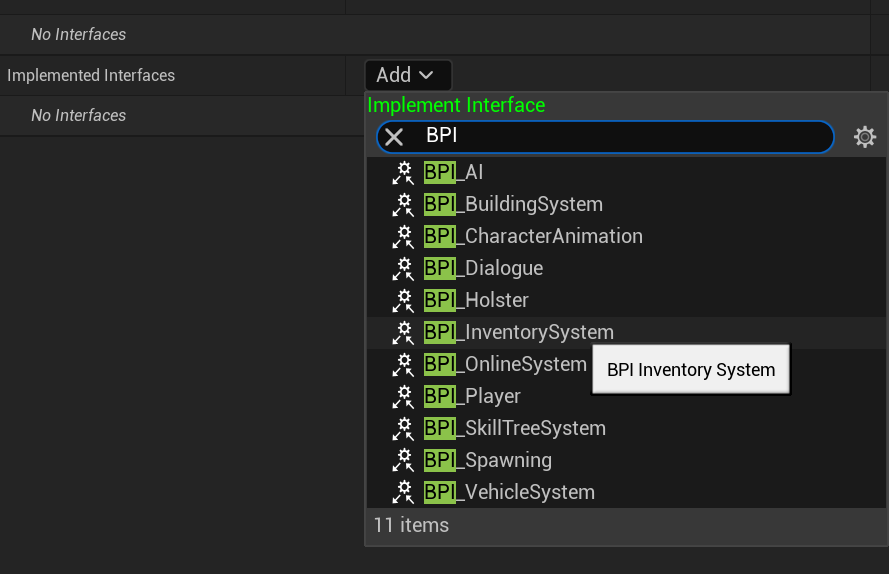
Step 3: Adjusting Class Settings
- Click on Class Settings located at the top of the editor window.
- In the right-hand panel, integrate the following interfaces to augment your actor’s functionality:
BPI Inventory SystemBPI Dialogue


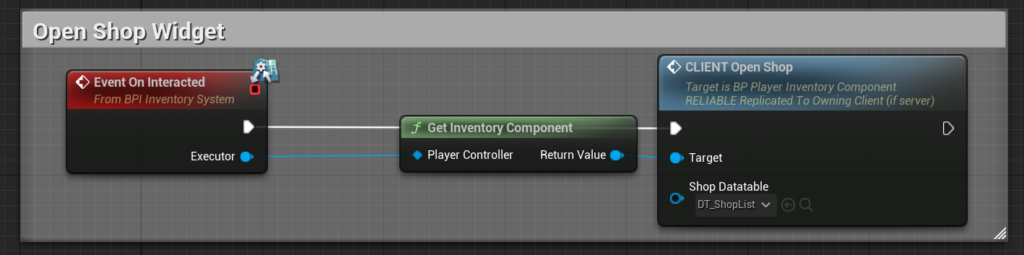
Step 4: Implementing the Code
Copy the code in the screenshot below within the event graph. This logic will govern how the actor behaves during gameplay and how it interacts with the aforementioned interfaces.
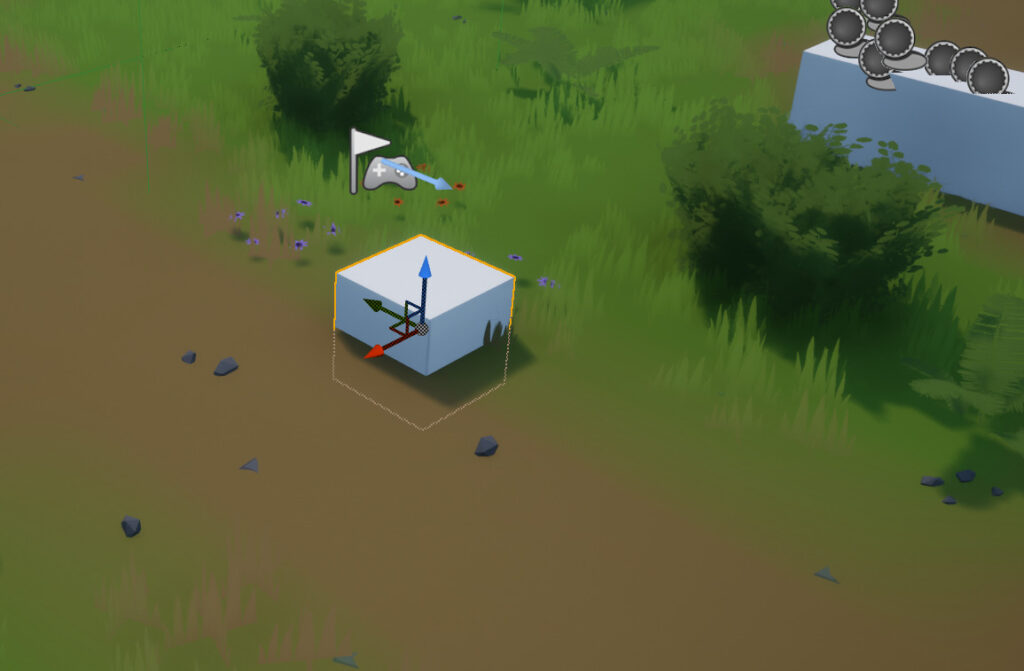
Step 5: Embedding the Actor into Your Level
- Simply drag and drop the newly-created actor into your game level. Position it carefully to ensure optimal interaction with the player.
- Optionally, perform any additional configurations to enhance its visual appeal and functionality within the context of your level.
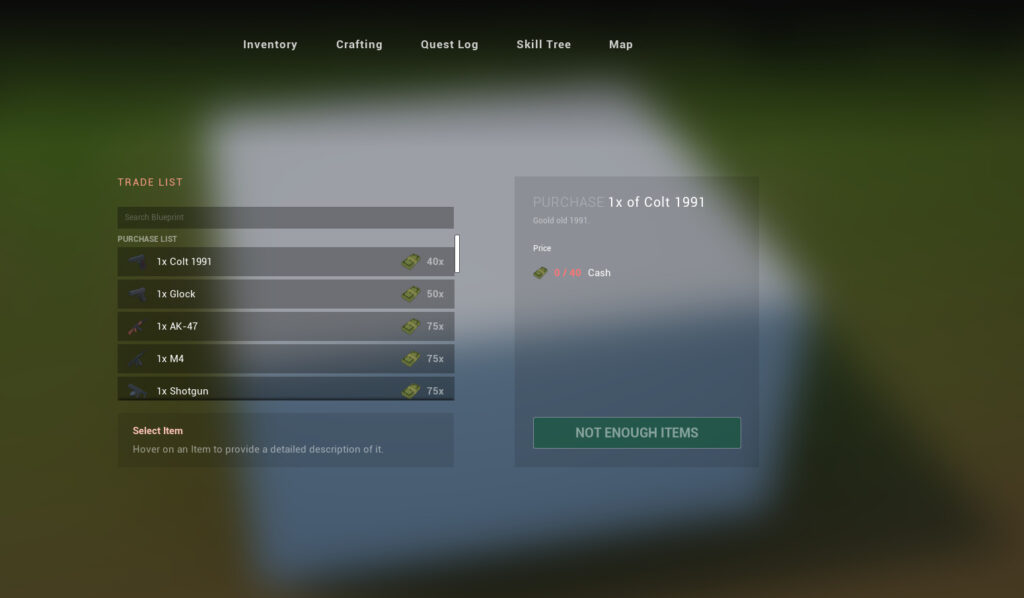
Step 6: Engage and Play!
Hit the Play button and explore your level. When you interact with the object, voilà – the shop will unfold before your eyes, ready for transactions and player engagement!
Conclusion
With these methodical steps, you’ve successfully integrated a shop component with a mesh, enhancing your game level with interactive shopping experiences! Continue to modify, experiment, and expand upon this foundation to create multifaceted, engaging player interactions throughout your gaming environment.